Mixing the Kick Drum: Weight, Click, Compression and Bass
You will learn where a kick's weight, box and beater live, how to shape them with EQ and compression, how to make the kick and bass share the low end, and how to layer samples without phase trouble.
By Delia Marchbanks, in Mixing
The kick drum is the anchor of most modern music. It sets the pulse, carries a large share of the low-frequency energy and often triggers the dynamics of everything around it. A kick that is too weak makes a mix feel timid; one that is too big swallows the bass and pushes the limiter into constant gain reduction.
Mixing a kick well means understanding its anatomy. Every kick, acoustic or sampled, has a few distinct regions, and each of them does a different job in the mix.
The Anatomy of a Kick
Think of a kick in three parts:
| Region | Range | What it gives |
|---|---|---|
| Fundamental (thump) | 40-100 Hz | Weight, felt more than heard |
| Box or body | 200-500 Hz | Wood, shell, sometimes mud |
| Beater (click) | 2-5 kHz | Attack, audibility on small speakers |
The fundamental gives the kick its weight on large systems. The beater click is what lets you hear the kick on a phone speaker, where nothing below about 150 Hz comes through. The box region is the one most often reduced, but removing too much leaves a kick that sounds like a synthetic thud with no shell.
Kicks also have a pitch. A synthesized kick often sweeps from a higher pitch down to a lower one over the first 30 to 80 ms. An acoustic kick has a less defined pitch but still a resonance that depends on head tuning and drum size. Knowing the pitch helps when you place the kick against a bass line.
Acoustic Kicks Versus Samples
Acoustic kicks
An acoustic kick is usually recorded with one or two microphones: one inside or at the port of the front head for attack, and one outside for low-end bloom. Some sessions add a third microphone further away, or a sub-style microphone for extra low end.
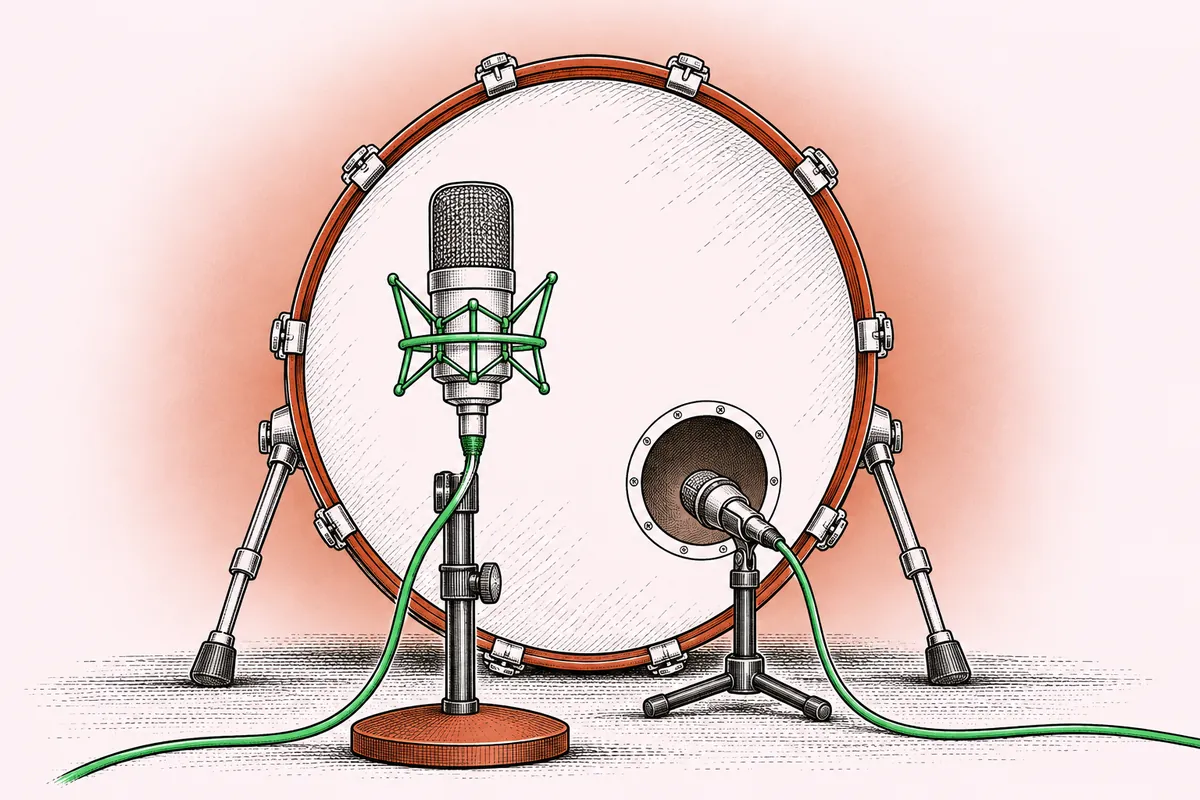
With multiple microphones, the inside and outside signals arrive at different times, which can cause cancellation in the low end. Before any EQ, check the polarity and alignment between them (see the phase section below). Then decide on a blend: the inside microphone for click, the outside one for body.
Sampled kicks
Samples arrive already shaped, often heavily processed. That is an advantage for speed and consistency, but it means the kick was often designed to sound impressive alone, with exaggerated sub and click. Treat it like any other source: decide what it needs in the context of the song rather than what it sounds like in solo.
Choosing the right sample is often the biggest decision. A kick that already fits the song's tempo, key and style needs very little processing. The guide on MIDI drums versus audio drum samples covers replacing and blending in more detail.
EQ Zones and Starting Moves
Make EQ decisions with the bass and the rest of the drums playing. Starting points:
- High-pass around 25-35 Hz. Removes subsonic energy that eats headroom without adding anything musical. Set it below the fundamental.
- Fundamental at 50-100 Hz. If the kick lacks weight, a 2-3 dB bell or low shelf near its fundamental helps. Find the exact frequency by sweeping.
- Box at 300-500 Hz. A cut of 2-6 dB with a medium Q often clears cardboard tone. Sweep slowly and cut only as much as the mix needs.
- Beater at 2-5 kHz. A 2-4 dB lift adds definition. Higher, around 6 to 8 kHz, adds a sharper, more clicky attack, suitable for metal or electronic styles.
Avoid boosting both the fundamental and the beater by large amounts. It pushes the kick louder without making it fit better. The guide on common EQ mistakes explains why gain-matched comparisons matter here.
Compression for Punch and Consistency
Compression on a kick has two possible jobs: shaping the transient for punch, or evening out inconsistent hits. Sampled kicks usually need only the first; live kicks often need both.
Shaping punch
A slower attack lets the initial hit pass through before the compressor clamps down, which emphasizes the click and the punch.
- Attack: 10-30 ms
- Release: 50-150 ms, short enough to recover before the next hit
- Ratio: 3:1 to 6:1
- Gain reduction: 3-6 dB on the hits
Set the release by ear so the compressor returns to zero gain reduction just before the next kick. At 120 BPM with kicks on every beat, that leaves 500 ms between hits, which is plenty. At faster tempos or with double kicks, use shorter release times.
Evening out hits
For a live kick with uneven velocity, a faster attack (1-5 ms) and moderate ratio reduces level variation. This softens the attack, so combine it with a gentle beater boost or use parallel compression to keep the transient. Compressor types and their character are explained in the guide to compression types.
Transient shapers
A transient shaper adds or reduces attack and sustain directly, without a threshold. It is a quick way to sharpen a soft kick or tighten one with too much boom.
Kick and Bass: Sharing the Low End
The kick and bass occupy the same frequencies. Without a plan, they mask each other and the low end turns into a blur.
Strategies, in order of simplicity:
- Arrangement: bass notes that leave space on the kick hits, or sit on offbeats, solve the conflict before any processing.
- Frequency split: decide which element owns the deepest octave. A kick with its weight around 60 Hz and a bass with energy around 80 to 120 Hz separate naturally. Cutting 2-3 dB on the bass at the kick's fundamental helps.
- Tuning: tune the kick to the song's key or to a note that sits comfortably against the bass line.
- Sidechain ducking: compress the bass lightly, triggered by the kick, so the bass dips for 50 to 150 ms when the kick hits. Gentle settings (2-4 dB of reduction) are often enough. The guide on sidechain compression covers the details.
- Dynamic EQ: instead of ducking the whole bass, a dynamic band keyed from the kick dips only the shared range.
The broader low-end picture, including small-room monitoring problems, is in the guide on mixing the low end.
Layering Kicks
Layering combines two or more kick sounds, typically one for the low end and one for the click. It is powerful, but it can easily make a kick bigger and worse at the same time.
- Give each layer a clear role. Filter the sub layer with a low-pass around 150 to 200 Hz, and the click layer with a high-pass around 150 to 300 Hz.
- Keep the layers short and avoid long, overlapping tails that make the kick muddy.
- Route layers to a kick bus and apply shared compression there, so they behave as one instrument.
- Check the combined level. Layered kicks often look correct on meters and still overpower the mix.
Phase and Polarity
Two kick signals that are slightly out of time can cancel each other in the low end. This happens with multiple microphones, with layered samples and when a sample is blended with an acoustic kick.
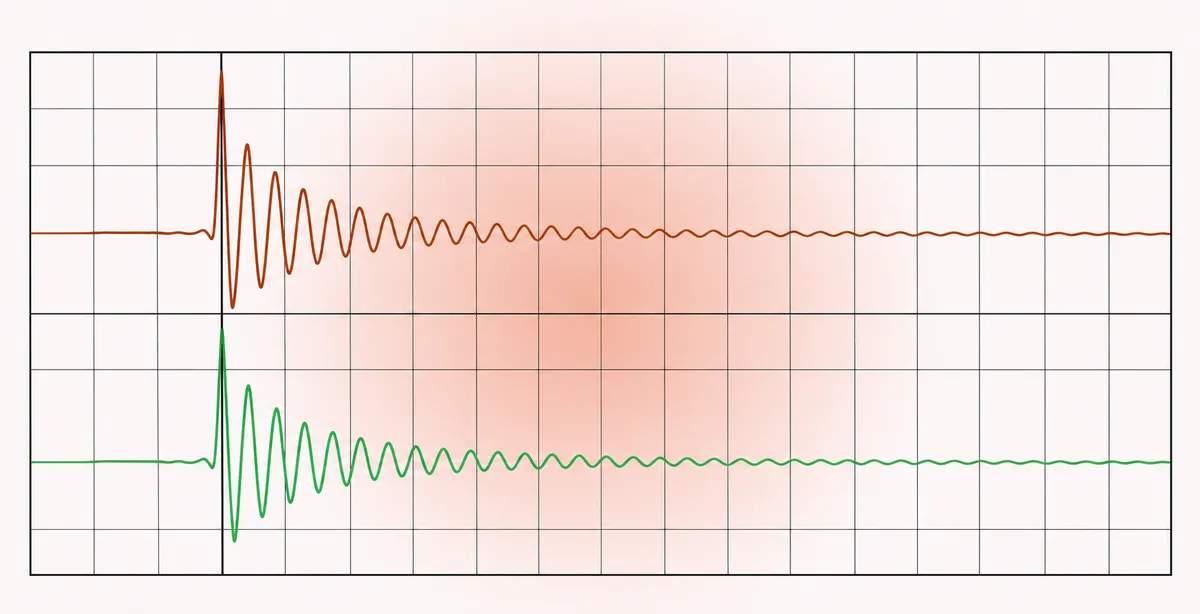
How to check:
- Zoom in on the waveforms and align the first transient of each layer. A shift of 1 ms equals about 34 cm of sound travel, and at 80 Hz even a few milliseconds change the result noticeably.
- Flip the polarity of one layer and listen. The setting with more low end and punch is usually correct.
- Sum to mono and listen for any loss of weight.
Alignment tools and sample-accurate nudging both work. Once aligned, the kick should sound fuller with less level, which also frees headroom for the rest of the mix.
Quick answers
Where is the punch in a kick drum?
Punch comes from the interplay of the fundamental around 50 to 100 Hz and the initial transient. The click around 2 to 5 kHz adds definition, especially on small speakers.
Should the kick or the bass be louder?
It depends on the style. In dance music the kick usually leads; in many rock and funk mixes the bass carries more weight. Decide which element owns the lowest octave and let the other step aside.
What attack time keeps a kick punchy?
An attack between 10 and 30 ms lets the transient through before compression begins. Faster settings reduce the punch.
Why does my layered kick sound thinner than one sample?
The layers are probably out of phase in the low end. Align their first transients, check polarity and filter each layer so only one carries the sub.