Getting Your Mixes Louder Without Losing Punch or Clarity
This guide shows where perceived loudness really comes from, how to read LUFS and crest factor, and how to raise the level of a mix in stages so it stays punchy after streaming normalization.
By Delia Marchbanks, in Mastering
Two mixes can peak at exactly the same level and still sound very different in loudness. One feels full and forward, the other feels small and distant. The difference rarely comes from a single plugin. It comes from how energy is spread across time and frequency, and from decisions made long before the final limiter.
This guide explains what makes a mix sound loud, how to read the meters that describe it, and how to add level in stages so the track keeps its punch. It also explains why streaming normalization changes the goal: the aim is a mix that sounds loud and lively at the same playback level as everything else, not the highest possible number.
Peak Level, Average Level and Crest Factor
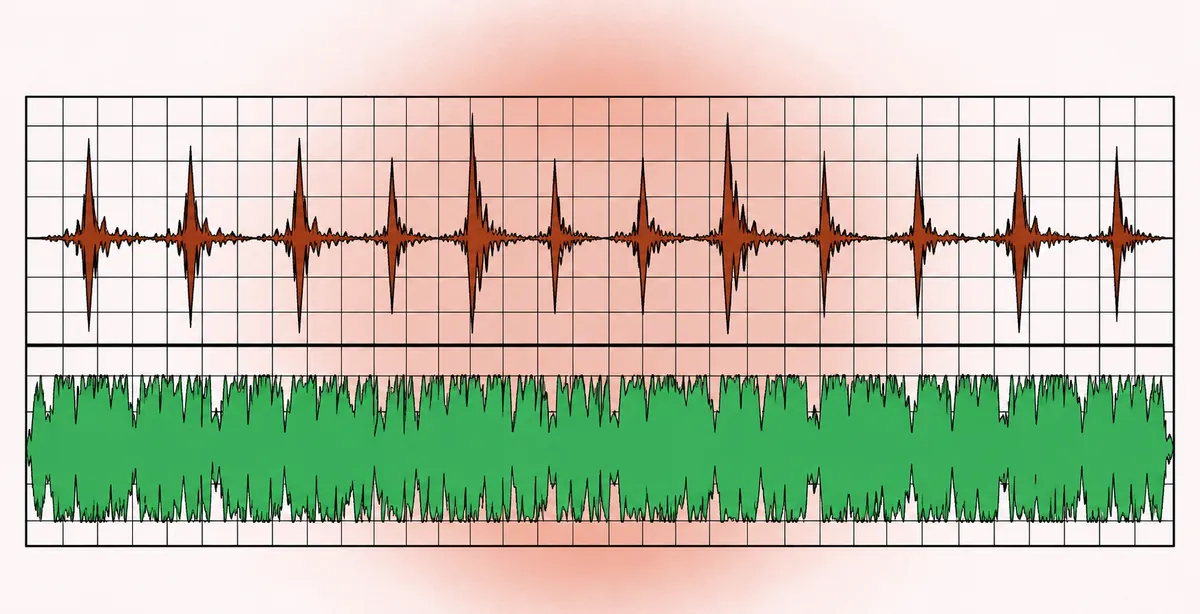
A digital file has a hard ceiling at 0 dBFS. Peaks cannot go above it without clipping. What the ear responds to, though, is mostly the average level over a short period of time, not the peaks.
Crest factor is the difference between the peak level and the average (RMS) level, in decibels. A raw drum recording might have a crest factor of 18 to 20 dB: sharp transients, quieter body. A dense modern pop master might sit around 8 to 10 dB. A heavily limited loud master can drop to 6 dB or less.
To make a mix louder, you reduce the crest factor: bring the average up closer to the peaks. Every tool for loudness does this in some way. Compression narrows the gap between loud and quiet parts. Limiting shaves the tallest peaks. Saturation rounds peaks and adds harmonics that raise the average. The trade-off is constant: the smaller the crest factor, the less room transients have to stand out, so punch and impact fade.
How Loudness Reads on a Meter
Peak meters and RMS meters are only part of the picture. Modern loudness is expressed in LUFS (loudness units relative to full scale), which weights frequencies roughly the way the ear does and adds gating so silence does not drag the reading down.
- Integrated LUFS: one number for the whole song. This is what streaming platforms use for normalization.
- Short-term LUFS: a three-second window. Useful for comparing the loudest sections, such as the final chorus, across references.
- Momentary LUFS: a 400 ms window, handy for spotting sudden jumps.
- Loudness range (LRA): how much the loudness varies over the track, in LU.
- True peak (dBTP): the highest peak after reconstruction, including peaks between samples.
When you compare your mix with a reference, look at short-term values in the loudest section and at the integrated value. A song with a quiet intro and a huge chorus can read lower integrated than a song that stays at one level, even if both choruses sound equally loud.
Loudness Starts in the Arrangement
The loudest-sounding records often have the simplest arrangements in their dense moments. When ten parts fight over the same 200 Hz to 2 kHz area, each one must be quieter to fit, and the limiter has to work harder on a mass of overlapping peaks.
Practical ideas before any processing:
- Give each part its own space. If a synth pad and a rhythm guitar play the same register, consider moving one up an octave, simplifying it, or dropping it in the chorus.
- Contrast creates loudness. A slightly sparser verse makes the chorus feel bigger without any extra level. This is why a song can feel loud even with a healthy dynamic range.
- Watch long sustained notes. Pads, held bass notes and wide reverb tails add constant energy that eats headroom.
These choices affect the master more than any plugin setting. If the arrangement is crowded, the five steps to take before a mix include building a rough balance, which is where crowding shows up first.
Control the Low End First
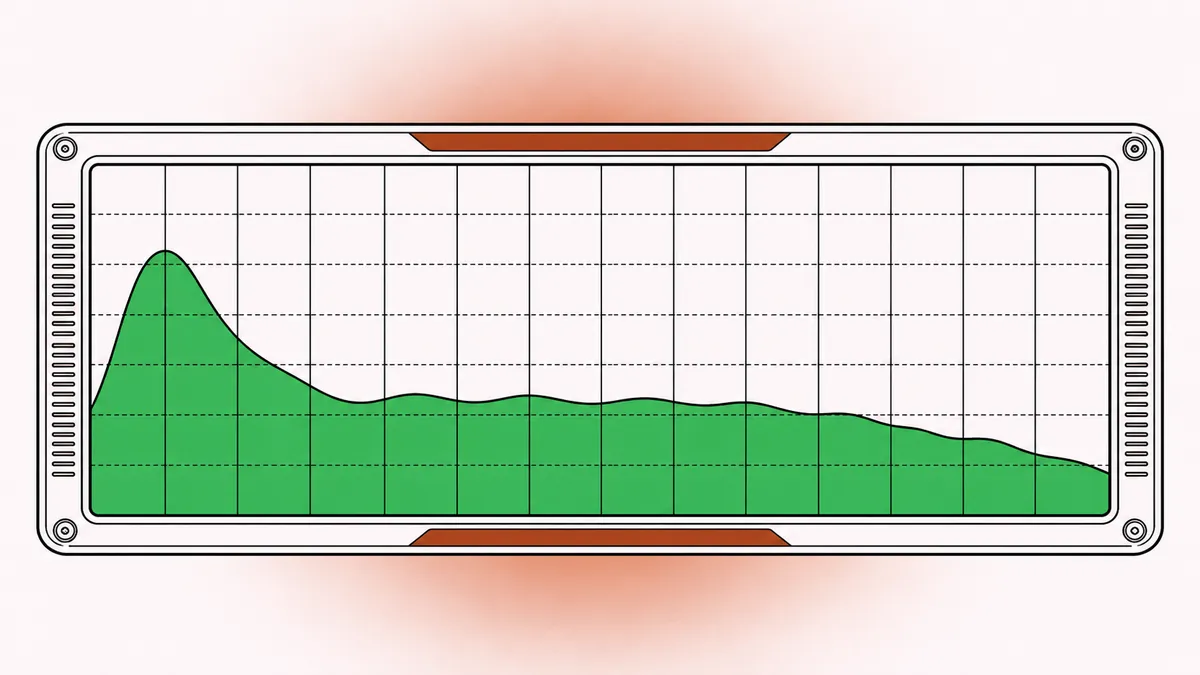
Bass frequencies carry the most energy in a mix. A kick and bass that are too loud, too long or overlapping eat headroom that the rest of the mix needs. When the limiter reacts to the low end, it pulls the whole mix down with each kick, which causes audible pumping.
Steps that free headroom:
- High-pass everything that does not need sub energy. Vocals, guitars, keys and overheads rarely need content below 80 to 150 Hz.
- Decide who owns the bottom octave. Usually the kick takes the 50 to 80 Hz punch and the bass sits just around it, or the reverse for sub-heavy styles. Sidechain compression or dynamic EQ can make them alternate.
- Keep the low end in mono below about 120 Hz. Out-of-phase low frequencies waste level and behave badly on mono systems.
- Shorten long sub notes if they ring into the next kick.
Harmonics also help on small speakers: a little saturation on the bass makes it audible on phones and laptops at a lower sub level, which leaves more room for overall loudness. The guide on kick drum mixing covers the kick side in detail.
Saturation and Clipping for Density
Soft saturation rounds off the sharpest peaks and adds harmonics. Used lightly, it raises perceived loudness for very little cost.
- On drums, a small amount of tape or tube style saturation softens transients by 1 to 3 dB, which the limiter later does not have to remove.
- On bass, it adds upper harmonics so the part reads on small speakers.
- On the mix bus, a gentle saturator can add density, but keep it subtle: if you hear fizz or crunch on cymbals, back off.
Soft clipping on the drum bus or before the limiter is a common modern technique. A clipper shaves the tallest transients almost instantly. For short peaks such as snare hits, the distortion is so brief it is hard to hear, and the limiter afterward works on a smoother signal. Start with 1 to 2 dB of clipping and compare at matched level.
Staged Limiting: Several Small Steps
Asking a single limiter for 8 dB of gain reduction usually sounds worse than spreading the work across several stages. Each stage does a little, and none of them reaches the point where artifacts become obvious.
A typical staged approach:
- Track level: compression on individual parts, such as vocals and bass, to stabilize them. 2 to 4 dB of reduction is common.
- Bus level: a gentle bus compressor on drums or the mix bus, 1 to 2 dB of reduction, ratio around 2:1. The guide on compressor types helps you choose a character for this job.
- Clipper: 1 to 2 dB on transients.
- Final limiter: 2 to 4 dB of gain reduction, ceiling around -1 dBTP.
Each stage should pass an A/B comparison at matched loudness. If bypassing a stage makes the track sound better at the same level, that stage is doing harm. The guide on limiters and true peak explains lookahead, release and oversampling settings for the final stage.
Platform Normalization: Why Louder Is Not Rewarded
Most streaming platforms turn tracks down to a common reference level. For several services, that reference is around -14 LUFS integrated, with some variation. A master at -8 LUFS integrated gets turned down by roughly 6 dB; a master at -14 LUFS plays at its own level.
The consequence: after normalization, the loud master and the moderate master play at the same perceived level. The heavily limited one now sounds flatter, with smaller transients and less impact, because it gave up dynamics for loudness that the platform removed. A moderate master often sounds punchier in the same playlist.
That does not mean every track should be mastered to -14 LUFS. Some genres sound right only when dense, and some platforms do not turn quiet tracks up. A balanced aim:
- Keep the loudest section in a range that suits the genre, often around -10 to -7 LUFS short-term for dense styles and -14 to -10 for others.
- Keep a true peak ceiling around -1 dBTP so lossy encoding does not clip.
- Judge the final master after turning it down to match a reference at the same LUFS reading. If it still sounds lively, you have the balance right.
For a broader view of the final stage, see the guide on mastering at home.
A Short Loudness Checklist
- Is the arrangement clear in the densest section?
- Do kick and bass share the low end without masking each other?
- Are non-bass parts high-passed sensibly?
- Is the low end mono below about 120 Hz?
- Is the gain reduction spread over several stages, none working too hard?
- Does the final master hold up when matched in loudness against references?
- Does the true peak stay at or below about -1 dBTP?
Quick answers
Why does my mix sound quieter than commercial tracks at the same peak level?
Peak level says little about loudness. Commercial masters usually have a lower crest factor, a cleaner low end and a less crowded arrangement, so their average level sits much higher.
What LUFS should I aim for?
Treat around -14 LUFS integrated as a streaming reference and adjust by genre. Dense electronic or rock styles often sit louder; acoustic music often sits quieter.
Is clipping always bad?
Hard digital clipping of the final output is. Controlled soft clipping of short transients before the limiter, by 1 to 2 dB, is a common and often inaudible way to gain density.
Does louder sound better on streaming?
Not after normalization. A heavily limited master is turned down to the same playback level as a moderate one and then often sounds flatter.