Gain Staging in the DAW: From Preamp to Mix Bus Without Guesswork
This guide gives you a level plan for every stage of a session, from the preamp knob to the mix bus, so recordings stay clean, plugins behave as designed and the mix leaves room for mastering.
By Delia Marchbanks, in Computer & Interface
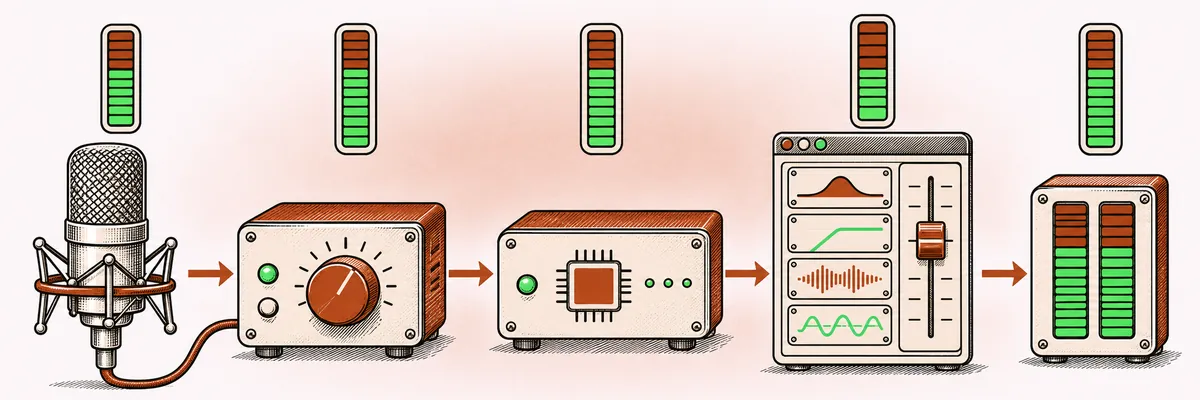
Gain staging is the habit of keeping the signal at a sensible level at each point it passes through. Too low and the noise of the preamp, the room and the converters creeps up. Too high and something clips, or a plugin modeled on analog hardware starts distorting before you asked it to. Between those two edges there is a wide, comfortable zone, and the goal is simply to stay in it from the first input to the final bounce.
Floating-point DAWs have made this easier than it used to be, but not irrelevant. The analog stages still clip, converters still have a hard ceiling, and many plugins still care what level they receive.
Two scales: dBu and dBFS
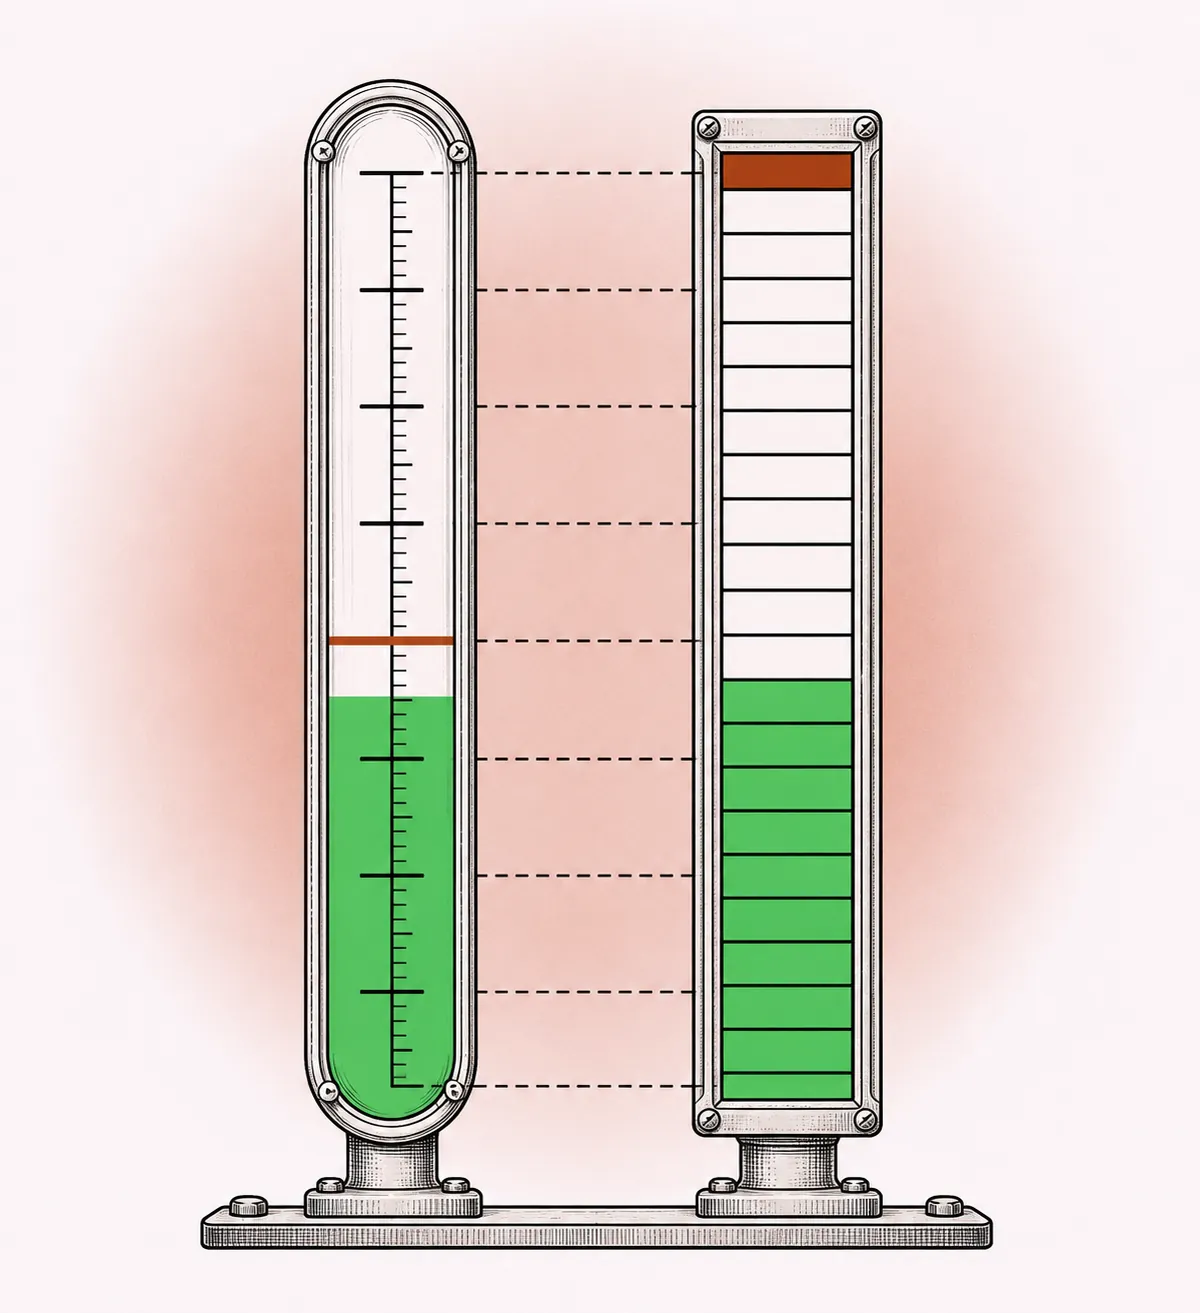
Analog gear and digital audio use different references, and gain staging starts with seeing how they line up.
dBu measures voltage. 0 dBu is 0.775 volts RMS, and professional line level is nominally +4 dBu. Analog equipment usually has plenty of room above nominal, often clipping somewhere around +20 to +28 dBu.
dBFS measures digital level against full scale. 0 dBFS is the largest value a fixed-point converter can produce; nothing goes above it. All real levels read as negative numbers.
The bridge between them is the converter's calibration: which analog voltage produces 0 dBFS. Two common alignments are:
| Alignment | Reference | 0 dBFS equals |
|---|---|---|
| European broadcast style | 0 dBu = -18 dBFS | +18 dBu |
| US film and post style | +4 dBu = -20 dBFS | +24 dBu |
Interfaces vary, and many home interfaces do not publish an exact figure, but the idea holds: a nominal analog level lands somewhere around -18 to -20 dBFS. That is where the familiar "-18 dBFS average" advice comes from. It is not a law of physics, just the digital equivalent of the level analog gear was designed around.
Setting recording levels
At 24-bit, the converter's own noise floor sits far below anything a home room produces. There is no reason to push recordings close to 0 dBFS, and every reason not to: a singer who gets excited on the last chorus will clip a take that was set to peak at -2 dBFS during the soundcheck.
Starting points for tracking at 24-bit:
- Average level around -18 dBFS on a meter with RMS or VU-style ballistics.
- Peaks between about -12 and -6 dBFS for most sources.
- Very dynamic sources (drums, percussion, shouted vocals) with peaks no higher than about -6 dBFS.
Set the preamp gain while the performer plays or sings the loudest part of the song, not a polite warm-up. Then leave the gain alone during takes; ride the performance in the mix if needed.
If a track comes in quiet, say peaking at -24 dBFS, it is usually fine. Raising it 12 dB later in the DAW adds no meaningful noise compared with the noise already in the room and the mic. A clipped take, on the other hand, cannot be repaired cleanly.
Watch the analog stages too
The interface preamp has its own clip point, usually shown by a red LED or a halo around the knob. With a hot source such as a kick drum mic or a line output from a synth, use the pad switch rather than turning the gain to minimum. And if a hardware compressor or channel strip sits before the interface, check that it is not clipping its own output into the converter. The guide to choosing an interface covers preamp gain range and pads.
Inside the DAW: floating point and its limits
Most DAWs process audio in 32-bit or 64-bit floating point. In that format, a channel can go well above 0 dBFS internally and come back down later without permanent clipping. That is why a fader pushed to +6 dB does not immediately ruin a track.
Three places still clip for real:
- The converters. Whatever leaves the mix bus to your monitors is clipped at 0 dBFS by the output converter.
- Fixed-point files. Bouncing a 24-bit or 16-bit file above 0 dBFS clips it permanently.
- Plugins that clip internally. Some processors, particularly emulations of hardware, have a deliberate ceiling or saturation stage.
So floating point protects you from accidents, not from habits. Keeping sensible levels inside the session makes meters readable, faders sit in their most precise range and plugins behave as designed.
Plugin sweet spots
Analog-modeled plugins are often calibrated so that a certain digital level equals their nominal analog level, frequently around -18 dBFS. Feed them much hotter and they add harmonics and compress; feed them much lower and they barely react. Clean digital tools, such as a transparent EQ, do not care about level at all.
Practical checks:
- Look in the manual for a calibration value. Some plugins include an input trim and a reference level setting.
- Watch the plugin's own meters if it has them. A VU needle pinned to the right is a sign of too much input.
- When a saturator or compressor sounds harsh for no reason, lower its input by 6 dB and raise its output to match. Often the harshness was level, not settings.
- Gain-match before and after any plugin you are judging. A louder result sounds better at first and fools the ear.
Threshold-based tools depend on level too. A compressor preset designed around -18 dBFS input will do nothing on a track averaging -30 dBFS, and far too much on one averaging -8 dBFS. Getting levels right first makes presets and your own saved settings reusable. The attack and release guide assumes levels in this range.
Clip gain, trim and faders
The DAW gives you several level controls, and each has a job.
Clip gain
Clip gain (also called region gain or item volume) changes the level of an audio region before any plugin. Use it to:
- bring a quietly recorded track up to a working level of around -18 dBFS average;
- even out a performance: lift a soft line, lower a shouted word, by 2 to 6 dB before the compressor;
- tame a plosive or a click on a single syllable.
Because clip gain acts before compression, it lets the compressor work on a steadier signal, which usually sounds more natural than heavy compression doing all the work.
Trim plugins
A trim or utility plugin in the first insert slot does the same job for the whole track, which is handy on multitrack recordings or imported stems. Some DAWs have a trim control built into the channel. Insert another trim between plugins whenever one processor's output is too hot for the next.
Faders
The fader should be the last level control, used for balance and automation. If faders end up far below unity, around -20 dB or lower, the tracks are probably too hot and fine adjustments become hard because faders are less precise down there. Lower clip gain or trim instead and bring faders back near 0 dB. Volume automation habits work better from that position as well.
Buses and the mix bus
Every bus sums its inputs, and summing adds level. Ten tracks each peaking at -10 dBFS can easily push a bus above 0 dBFS. Keep an eye on:
- Group buses. A drum bus peaking near -6 dBFS leaves room for bus compression and saturation.
- Effect returns. Reverb and delay returns add level that is easy to forget.
- The mix bus. A finished mix peaking somewhere around -6 to -3 dBFS before any limiter, with no clipping anywhere, gives mastering clean material.
Pulling the master fader down to stop the master meter clipping fixes the meter, not the cause. Plugins on the mix bus that sit before the master fader still see the hot signal. Lower the individual tracks or group buses instead, all together if needed, by selecting them and moving their faders or trims in one go.
A simple level plan
| Stage | Target |
|---|---|
| Tracking, average | Around -18 dBFS |
| Tracking, peaks | -12 to -6 dBFS |
| Into analog-modeled plugins | Around -18 dBFS average |
| Drum or group bus peaks | Around -6 dBFS |
| Mix bus peaks, before mastering | -6 to -3 dBFS |
These numbers are starting points with wide tolerance. A track peaking at -14 dBFS or -4 dBFS is not wrong; a track clipping, or one so low its fader sits at the bottom, is. For the same reasoning applied to file formats and resolution, see sample rate and bit depth, and for definitions of the terms used here, the production glossary.
Quick answers
Is -18 dBFS a strict rule?
No. It is a convenient average level that lines up with nominal analog level on many converters and plugins. Anything roughly between -22 and -12 dBFS average works well.
Can a track clip inside a floating-point DAW?
Not internally in most cases, but the output converter, fixed-point bounces and some plugins do clip. Treat 0 dBFS as a real limit anyway.
Should clip gain or the fader be used to fix a quiet track?
Use clip gain or trim to set the working level before plugins, and keep the fader for balance and automation in the mix.
Why does the mix sound better after lowering everything?
Plugins that react to level, especially analog emulations and compressors, often behave better with less input. Lower levels also leave headroom on buses so nothing distorts when sections get dense.