Buffer Size and Latency: Setting It for Tracking and for Mixing
By the end of this guide you will know how to work out the delay your buffer adds, pick a sensible size for recording and for mixing, and fix crackles without guessing.
By Delia Marchbanks, in Computer & Interface
Every recording program moves audio in small chunks rather than one sample at a time. That chunk is the buffer, and its size decides two things that pull against each other: how long the sound takes to get through the computer, and how much breathing room the processor has before it runs out of time. Set it too small and the session crackles. Set it too large and a singer hears their own voice arrive late in the headphones. Knowing how to adjust the buffer size depending on the situation is one of the first habits that separates a smooth session from a frustrating one.
The good news is that the math is simple, and once you can do it in your head, the settings stop feeling like a gamble.
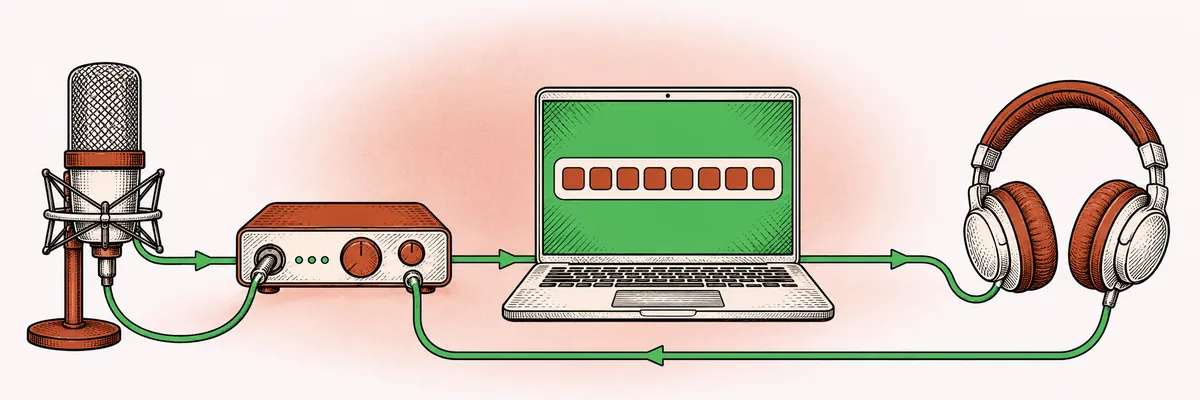
What the buffer actually is
Your audio interface converts sound into a stream of numbers at a fixed rate, the sample rate. At 48 kHz, that is 48,000 numbers per second for each channel. The computer cannot respond to each of those numbers the instant it arrives, because it is also drawing the screen, reading the disk and running other programs. So the driver collects a block of samples, hands the whole block to the recording software, and the software processes it while the next block fills up.
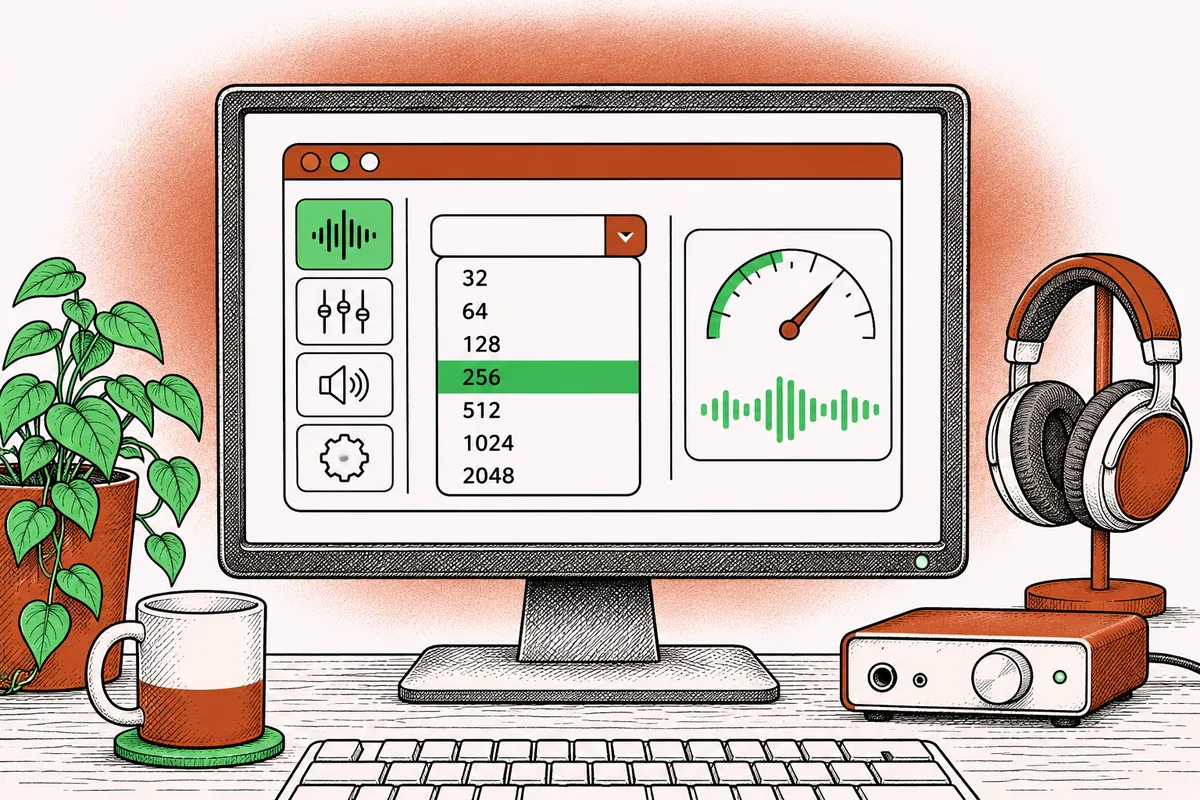
The buffer size is the length of that block, expressed in samples. Common choices are 32, 64, 128, 256, 512, 1024 and 2048. A larger block gives the processor more time to finish its work on each chunk, but every sample in the block has to wait until the block is full before anything happens to it.
The latency math
The delay added by one buffer is the buffer size divided by the sample rate:
- 64 samples at 48 kHz = 64 / 48,000 = 1.33 ms
- 128 samples at 48 kHz = 2.67 ms
- 256 samples at 48 kHz = 5.33 ms
- 512 samples at 44.1 kHz = 11.6 ms
- 1024 samples at 48 kHz = 21.3 ms
That number is only one leg of the trip. When you monitor through the computer, the sound passes an input buffer on the way in and an output buffer on the way out, so the round trip is at least twice the figure above. Then add the converters themselves (often somewhere around 0.3 to 1 ms each way), plus any safety buffer the driver adds quietly. A 128 sample setting at 48 kHz commonly lands somewhere between 6 and 9 ms of real round-trip delay, depending on the interface and driver.
A handy way to feel those numbers: sound in air covers roughly one foot per millisecond. Eight milliseconds of latency is about the same as standing eight feet from a speaker. Most players do not notice that. Twenty milliseconds starts to feel like playing in a large hall, and thirty or more makes tight rhythm parts hard to perform.
Sample rate changes the result
Doubling the sample rate halves the time each buffer takes, because the same number of samples passes twice as fast. A 256 sample buffer at 96 kHz gives the same delay as 128 samples at 48 kHz. The catch is that the computer now has to process twice as many samples per second, so the CPU load climbs. Higher rates are a trade, never free latency. The guide on sample rate and bit depth covers the other reasons to pick one rate over another.
Settings for tracking
When you record, the performer is listening to themselves in real time, so latency is the priority. Starting points:
| Task | Buffer at 44.1/48 kHz | Notes |
|---|---|---|
| Vocals, monitored through plugins | 64 to 128 | Voice is the most sensitive source |
| Guitar through an amp simulator | 64 to 128 | Players feel delay in the fingers |
| Software instruments played live | 64 to 256 | Keys tolerate a little more |
| Drums or percussion via MIDI | 32 to 128 | Timing is everything |
| Recording with direct monitoring | 256 to 512 | The computer is not in the listening path |
Singers are the hardest case. A voice reaches the inner ear through the skull almost instantly, so even a few milliseconds of delay in the headphones blends with that bone-conducted sound and creates a hollow, phasey tone. Some vocalists accept 5 ms, some complain at 3 ms. If a singer says the headphones sound strange, latency is a likely cause before you blame the mix.
To keep a small buffer stable while tracking, lighten the load:
- Bypass or remove heavy plugins on the mix bus, especially lookahead limiters and linear phase EQs.
- Freeze or bounce virtual instruments that you are not currently playing.
- Close browsers, cloud sync tools and anything that polls the network.
- Record onto a track with as few inserts as possible.
Direct monitoring: taking the computer out of the loop
Most interfaces can route the input straight to the headphone output before the signal ever reaches the computer. This is direct monitoring, sometimes called zero-latency or hardware monitoring. The performer hears the input with essentially no delay, while the recording software captures the same signal in the background at whatever buffer size you like.
The trade is that the performer hears the dry input, without the plugins on the track. If a singer wants reverb in the cans, some interfaces include a small onboard mixer with built-in effects, which solves the problem without touching the buffer. If not, a dry vocal with a balanced backing track is usually fine for performing.
Two rules keep direct monitoring clean:
- Mute software monitoring on the record track, or the performer will hear two copies of themselves a few milliseconds apart, which sounds like a comb filter.
- Balance the direct input against the playback with the interface mixer or the mix knob, then leave it alone during takes.
If you are choosing hardware, the guide on picking an audio interface explains which monitoring features matter for this.
Settings for mixing
Once nothing is being performed live, latency stops mattering. A delay of 20 or 40 ms between pressing play and hearing sound is easy to ignore. What matters now is headroom for the processor, because a mix session might run dozens of equalizers, compressors and reverbs at once.
Raise the buffer to 512, 1024 or even 2048 samples when mixing. The software gets larger time windows to compute each block, CPU spikes become far less likely to cause dropouts, and you can run more plugins before the session struggles.
A common workflow is to keep two habits: small buffer while recording, large buffer the moment tracking ends. Some people even save two audio presets in the DAW so switching takes one click.
Low-latency modes and plugin delay compensation
Many plugins introduce their own delay. A limiter with lookahead needs to read the signal a few milliseconds ahead of time. A linear phase equalizer can need tens of milliseconds. Oversampling stages add a little more. The DAW keeps every track in time by delaying all the other tracks by the same amount, a process called plugin delay compensation.
That compensation is a good thing for mixing, but it is bad news when you are tracking into a session that has a lookahead limiter on the master: the whole playback path is pushed back to match the slowest plugin, and your small buffer no longer helps. This is why many DAWs offer a low-latency or constrained compensation mode. When switched on, it temporarily bypasses plugins that report more than a set amount of delay, so live monitoring stays tight. Turn it on while recording overdubs into a nearly finished mix, then turn it off when you return to mixing.
Recording offset: making sure takes land on time
The latency figure shown in your audio settings comes from the driver. The DAW uses it to shift newly recorded audio earlier, so it lines up with what you were hearing. If the driver reports the wrong value, overdubs end up a few samples or a few milliseconds late.
You can check this with a loopback. Connect a cable from an output of the interface back into an input, play a short click from a track, and record it on another track. Zoom in to sample level and compare the two. If the recorded click sits a fixed number of samples late or early, enter that number in the recording offset or latency adjustment setting of your DAW. The check takes five minutes and pays off every time you stack harmonies or double guitars.
Crackles, pops and dropouts
A click or crackle usually means the computer failed to finish a block before the deadline. The interface had nothing to play, so it produced a gap. Raising the buffer is the first fix, but if dropouts appear even at 512 or 1024 samples, something else is wrong. Work through this list:
- Power settings. Laptops throttle the processor to save battery. Use a high performance power plan and plug the computer in.
- Background activity. Wireless network adapters, cloud backup and some antivirus scans cause sudden spikes. Pause them during sessions.
- One heavy track. The DAW usually processes each track on a single core. A track stacked with plugins can overload that core while the overall meter reads low. Split processing across tracks or bounce the heavy one.
- Mismatched sample rates. If the system audio device and the DAW disagree about the rate, some drivers resample on the fly and glitch. Set both to the same rate.
- Driver choice. On Windows, use the dedicated driver from the interface maker rather than a generic one. On a Mac, the built-in Core Audio path is usually stable for class-compliant devices.
- USB hubs. Plug the interface directly into the computer rather than through an unpowered hub shared with other devices.
The CPU meter in most DAWs shows how close each buffer is to its deadline, which is more useful than the general processor meter of the operating system. If it hovers above roughly 70 percent, crackles are near.
A simple routine for every session
- Set the sample rate for the project before recording anything, and leave it.
- Choose a small buffer, 64 or 128 samples, at the start of tracking.
- If the performer only needs a dry signal, use direct monitoring and relax the buffer to 256 or more.
- Switch on the low-latency mode when overdubbing into a heavy mix.
- Raise the buffer to 1024 or so once mixing begins.
- Keep levels sensible on the way in, as explained in gain staging inside the DAW, because no buffer setting can fix a clipped input.
If you program drums or other parts with a controller, the same logic applies to timing feel; the comparison of MIDI drums against audio samples touches on how latency affects playing in parts. For a wider view of the computer side of the studio, browse the computer and interface guides.
Quick answers
What buffer size should I use for recording vocals?
Start at 64 or 128 samples at 44.1 or 48 kHz. If the computer crackles at that size, use direct monitoring on the interface instead and raise the buffer.
Does a bigger buffer change the sound of my recording?
No. The buffer only changes timing and processing headroom. The captured audio is identical whatever the setting, as long as nothing drops out.
Why is my latency higher than the buffer math suggests?
The simple formula covers one buffer. Real round trips include input and output buffers, converter delay and a driver safety margin, so expect two to three times the single figure.
Is 96 kHz better for low latency?
It halves the time per buffer, but it doubles the processing load. A smaller buffer at 48 kHz often gives similar latency with less strain on the computer.
Should I mix with a small buffer?
There is no benefit. Mixing does not involve live performance, so a large buffer of 1024 samples or more gives the plugins room to run without dropouts.